 |
|
 |
How to Build Your Own PC - Save A Buck And Learn A Lot 9 Chapter 3: Installing the CPU, Heatsink, and RAM On The Mainboard 9 Installing the Heatsink/Fan |
|


Seating the Heatsink
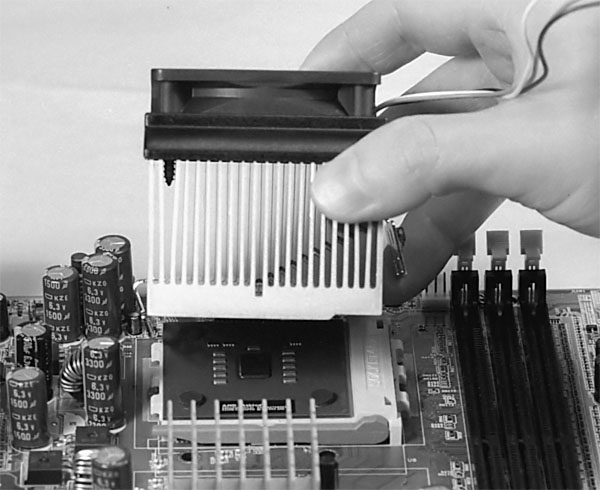
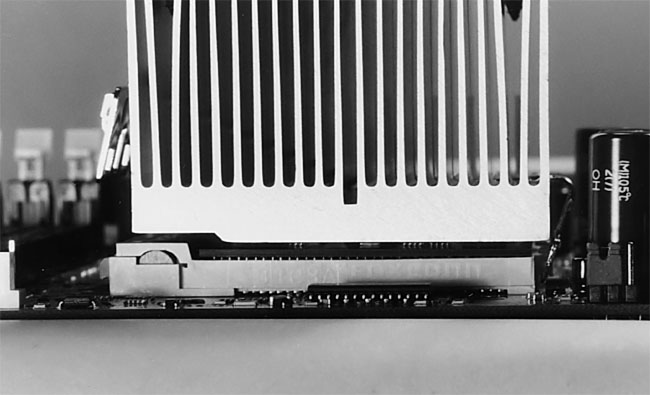
Seat the heatsink on top of the CPU (see Figure 32), manipulating the shorter end of the clip so that the three holes of the clip engage the bottom of the three notches of the CPU socket. Don’t push the heatsink down. That’s done naturally by the heatsink clip as the clip is secured. Do examine the edges of the heatsink to be sure the heatsink isn’t hitting anything besides the four feet it’s supposed to rest on; when the CPU is in place it should look something like Figure 33.
|
|
|
Home - Table Of Contents - Contact Us
How to Build Your Own PC (/byop/) on PCGuide.com
Version 1.0 - Version Date: May 4, 2005
Adapted with permission from a work created by Charlie Palmer.
PCGuide.com Version © Copyright 2005 Charles M. Kozierok. All Rights Reserved.
Not responsible for any loss resulting from the use of this site.