 |
|
 |
How to Build Your Own PC - Save A Buck And Learn A Lot 9 Chapter 3: Installing the CPU, Heatsink, and RAM On The Mainboard 9 Installing the Heatsink/Fan |
|


Orienting the Heatsink
Examine the top of the Athlon CPU and you’ll notice four feet (see Figure 31). These feet are designed so that the heatsink/fan can be placed on top of them. You need all four feet for proper seating of the heatsink. The feet should already be in place and ready to go. When the heatsink is secured, these feet will compress slightly, allowing the heatsink to contact the CPU die.
|
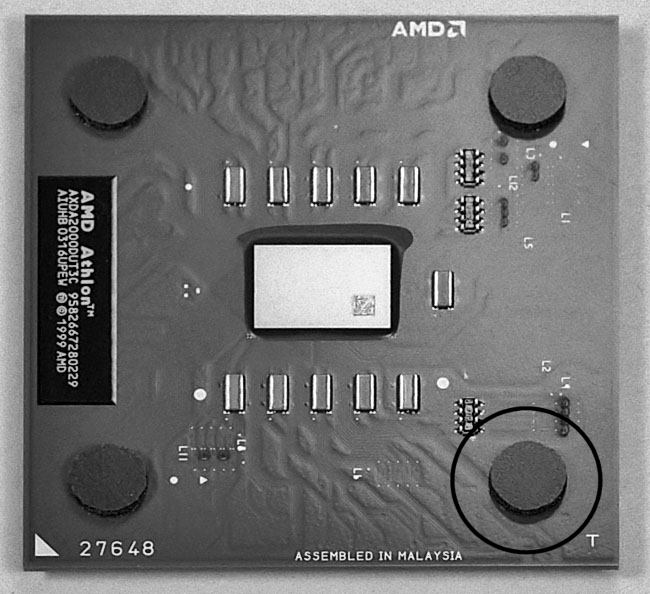
Examine the center of the CPU (inside the four feet). You’ll see a small square, which is called the die. The die is important, because it will get really hot and heat will need to be drawn away from it. This will occur by allowing the die to thermally contact the metal of the heatsink. This effectively increases the thermal mass of the die and allows heat to be dissipated into the PC case. A CPU fan will blow air through the heatsink. Other fans will circulate air in the PC case and remove the heat from the PC.
Examining the heatsink, you might guess that it can be installed in any direction. You might guess that you can just set it on top of the CPU in any orientation (Figure 4.8). This isn’t so. Examine the bottom of the heatsink (Figure 4.9) and you’ll see that one edge of the heatsink is slightly indented or cut away. This allows that edge of the heatsink to clear the top of the CPU socket (the part of the socket from which the lever pivots from, which is a bit higher than the rest of the socket). So, you’ll need to pay attention to orientation.
Also, if you look through the fins of the heatsink (Figure 4.10), you’ll see that the metal clip that will be used to secure the heatsink to the CPU socket isn’t symmetrical. One side of the clip is shorter than the other. When the heatsink is seated properly, the clip is designed so that it will push the heatsink down onto the CPU, and the force from the clip will be directly above the CPU die.
|
Home - Table Of Contents - Contact Us
How to Build Your Own PC (/byop/) on PCGuide.com
Version 1.0 - Version Date: May 4, 2005
Adapted with permission from a work created by Charlie Palmer.
PCGuide.com Version © Copyright 2005 Charles M. Kozierok. All Rights Reserved.
Not responsible for any loss resulting from the use of this site.