 |
|
 |
How to Build Your Own PC - Save A Buck And Learn A Lot 9 Chapter 3: Installing the CPU, Heatsink, and RAM On The Mainboard 9 Installing the Heatsink/Fan |
|


Checking Installation and Connecting the Fan
The installation instructions say you should examine the seating of the heatsink to be sure it’s resting properly on the die. In practice, it’s difficult if not impossible to do this (see Figure 33). But, if you have a good light handy, you can peek between the heatsink and the CPU if you want. (Incidentally, a Mini-Mag AA flashlight is a great tool to have handy here.)
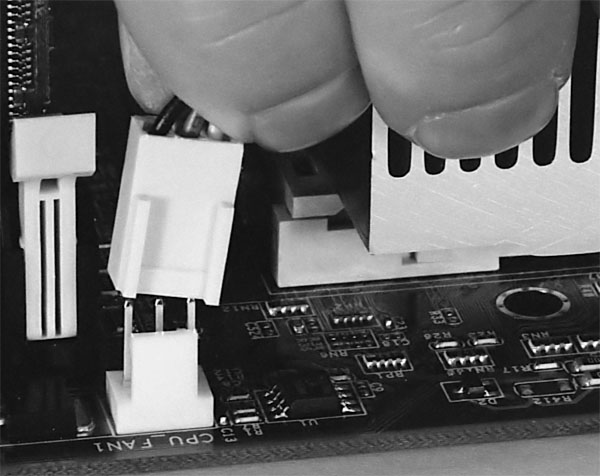
Finally, examine the mainboard manual and see where the three-pin CPU fan power connection pins are. They’re usually clearly marked. Then, plug in the heatsink fan (Figure 37). Don’t forget to plug in the heatsink/CPU fan! Do this immediately after the heatsink is installed! If the heatsink fan isn’t plugged in, it won’t work and your CPU will overheat. When your system is fully assembled, it’s a good idea to leave the side of the case off and examine all of the fans to be sure they’re operating properly.
|
While the thermal grease and the connection between the CPU die and the heatsink allow heat to be conducted away from the CPU, the heat builds up on the fins of the heatsink where the fan dissipates it from there. The fins spread this heat over a large area, and the fan helps blow the heat away.
You now have your CPU and heatsink properly installed on your mainboard. Well done!
|
Home - Table Of Contents - Contact Us
How to Build Your Own PC (/byop/) on PCGuide.com
Version 1.0 - Version Date: May 4, 2005
Adapted with permission from a work created by Charlie Palmer.
PCGuide.com Version © Copyright 2005 Charles M. Kozierok. All Rights Reserved.
Not responsible for any loss resulting from the use of this site.