 |
|
 |
How to Build Your Own PC - Save A Buck And Learn A Lot 9 Chapter 4: Installing The Mainboard In The Case 9 Changing The I/O Shield |
|


Installing the New I/O Shield
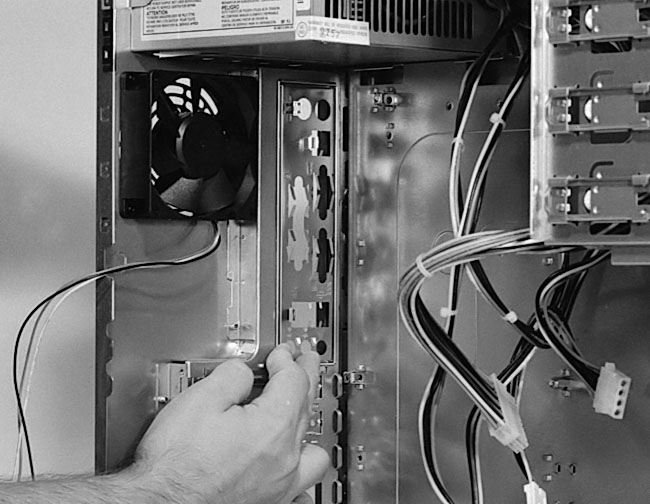
Now we’ll put the new I/O shield in place. First we will orient it as shown in Figure 61. Then, since this new shield is the conventional style, we’ll pop it into place from inside the case (Figure 62). After installing the I/O shield from the inside of the case, we could use the back of a screwdriver to push the I/O shield into place. Some I/O shields have very sharp edges, so be careful not to allow your hand to slip and hit the shield or the case when you’re removing or installing an I/O shield. Remember, blood spurting out of your finger will detract from the fun of building your own PC.
|
|
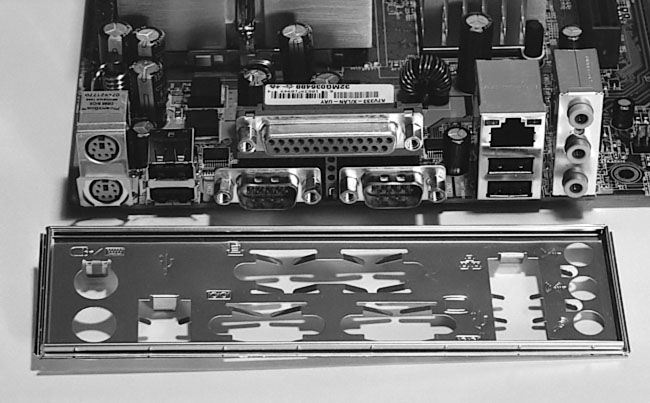
The preceding figures show us that the orientation of the I/O shield is important. Typically, the PS/2 connectors for the keyboard and the mouse will sit toward the top of the case.
|
Home - Table Of Contents - Contact Us
How to Build Your Own PC (/byop/) on PCGuide.com
Version 1.0 - Version Date: May 4, 2005
Adapted with permission from a work created by Charlie Palmer.
PCGuide.com Version © Copyright 2005 Charles M. Kozierok. All Rights Reserved.
Not responsible for any loss resulting from the use of this site.