 |
|
 |
How to Build Your Own PC - Save A Buck And Learn A Lot 9 Chapter 4: Installing The Mainboard In The Case 9 Changing The I/O Shield |
|


Comparing I/O Shield to Motherboard I/O Connectors
The I/O shield that comes with the case doesn’t match up with the connectors on the mainboard. We can see this by comparing the I/O connectors on the mainboard to the shield. Just hold the mainboard up to the shield or place it inside the case so the connectors face the I/O shield to see if the mainboard matches the existing I/O shield. If the mainboard comes with its own I/O shield, we can hold up the I/O shield that comes with the mainboard and compare it to the one that comes with the case (Figure 56).
|
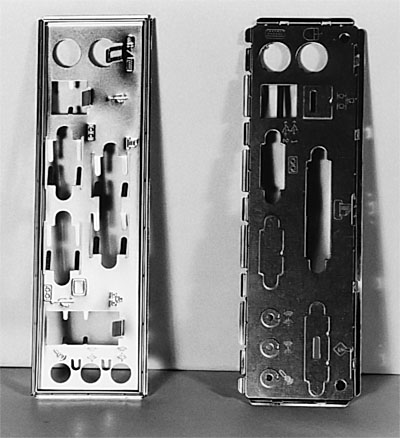
Our mainboard has built-in networking, and there is an RJ-45 network connection directly to the mainboard. The I/O shield that comes with the mainboard allows for this connection, while the standard one that comes with the case doesn’t. So, we need to replace the I/O shield.
|
Home - Table Of Contents - Contact Us
How to Build Your Own PC (/byop/) on PCGuide.com
Version 1.0 - Version Date: May 4, 2005
Adapted with permission from a work created by Charlie Palmer.
PCGuide.com Version © Copyright 2005 Charles M. Kozierok. All Rights Reserved.
Not responsible for any loss resulting from the use of this site.