 |
|
 |
How to Build Your Own PC - Save A Buck And Learn A Lot 9 Chapter 4: Installing The Mainboard In The Case 9 Examining the Drive Cages |
|


5.25” Drive Cage
Some cases will also have removable cages for 5.25" drives, such as CD-RW drives. Working with a 5.25" cage is usually the same as working with a 3.5" cage. Either the 5.25" drives will be attached to the cage with screws or sometimes rails will be attached to the drive and then the rails slide into place in the cage. If rails come with your case, just attach the rails to the drive and insert the drive. Be sure the rails aren’t upside down or backward.
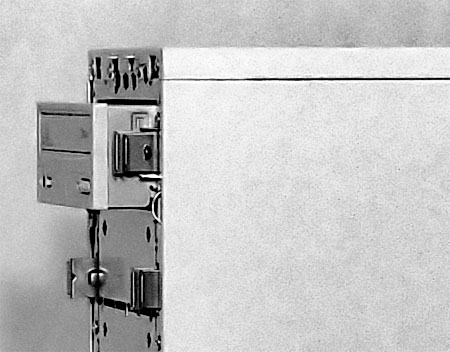
This particular case doesn’t use a 5.25" removable cage. And, it doesn’t have removable rails which are attached to the sides of the drives. Rather, for each drive bay, it has levers that pull out. Then the drive is placed into its bay and pushed into place, and the levers are closed to engage the drive and hold it in place (Figure 51). This design doesn’t even require a screwdriver.
|
|
Home - Table Of Contents - Contact Us
How to Build Your Own PC (/byop/) on PCGuide.com
Version 1.0 - Version Date: May 4, 2005
Adapted with permission from a work created by Charlie Palmer.
PCGuide.com Version © Copyright 2005 Charles M. Kozierok. All Rights Reserved.
Not responsible for any loss resulting from the use of this site.