 |
|
 |
How to Build Your Own PC - Save A Buck And Learn A Lot 9 Chapter 5: Installing Drives 9 Installing the Floppy Drive |
|


Testing the Floppy Drive’s Fit in the Case
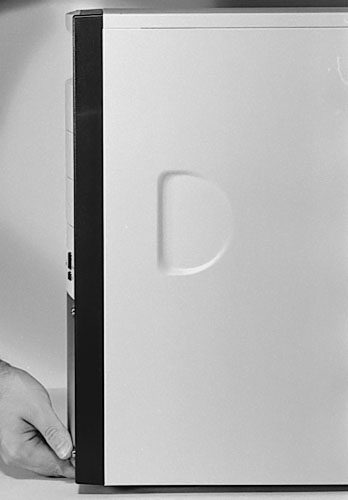
The Enlight case has the floppy drive sit behind the bezel. This means the floppy drive can’t protrude too much or you won’t be able to close the front of the case. To get the depth correct, this cage has exact holes in the cage to position the drive and tighten it into place. But, just to make it challenging, there are two different sets of holes to allow the drive to seat at two different depths. If, as you close the bezel, you find the floppy drive doesn’t sit at the proper depth, just remove the floppy and try the other set of cage holes. I’d recommend starting with the set of holes that puts the floppy the farthest back. When closing the front of the case (bezel), never force it. It could be that the floppy drive protrudes too far.
Other cages, where the front of the floppy drive is flush with the front of the case, often have slots which allow you to adjust the drive back and forth until it’s exactly flush with the front of the case. Then you can screw the floppy drive into place. Sometimes the slots are a bit oversized and the small screw heads will have a poor grip on the slot.
Let’s put the cage back into the PC and gently try to close the front (Figure 77). If the front doesn’t close properly, we can see the drive protrudes too much, and we’ll need to use the other set of cage screw holes to move the drive back. Be sure when you close the front of the case that something isn’t preventing it from closing, such as a floppy drive that’s sticking out too far. With too much force, it’s possible to break the bezel. You might want to close the front with no drives installed, just to get a feel for how much force it takes to finally pop the bezel into place.
|
|
Home - Table Of Contents - Contact Us
How to Build Your Own PC (/byop/) on PCGuide.com
Version 1.0 - Version Date: May 4, 2005
Adapted with permission from a work created by Charlie Palmer.
PCGuide.com Version © Copyright 2005 Charles M. Kozierok. All Rights Reserved.
Not responsible for any loss resulting from the use of this site.