 |
|
 |
How to Build Your Own PC - Save A Buck And Learn A Lot 9 Chapter 8: Testing the System and Completing Assembly |
|


Preparing to Test the System
For the Enlight case, the side of the case should be replaced before the front bezel is replaced. However, we wish to see that the CPU fan is turning rapidly, so we’ll leave the side of the case off for now. We will replace the front of the bezel, although we could just as easily push the start/stop button with the bezel off. The front cover is purely decorative. If in doubt which button is for on-off and which is the reset, you could just hold up the bezel and see which button is which.
There is ongoing debate about whether or not you should run a system with its internals exposed. Some say that modern cases are designed for effective cooling, sucking the air in from one side of the case and blowing it out the other side. They say that with the side removed, the proper sucking and blowing airflow isn’t maintained and the system can overheat.
The other group says that, with the side of the case off, there is great air circulation between the inside of the case and the outside, and that’s about the best ambient temperature you’ll ever get inside the case anyway, and so its fine. (If you have a program to measure CPU and mainboard temperature, you can test this to see which is cooler. See Figure 4.7) We’ll compromise and lay the removed side panel of the case up against the exposed side of the case. It’s generally agreed if the PC has a hard drive smaller than 20 GB, the case should be fully covered to protect the PC from embarrassment.
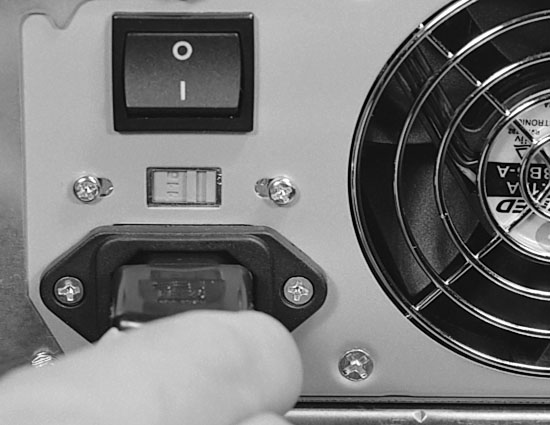
Now, we plug in the monitor to the back of the video adapter card. We plug in the power cord to the back of the case (Figure 127). And, we plug in the monitor to give it power.
It’s recommended that you not plug your computer and monitor directly to a wall outlet. Rather, you should purchase a UPS (uninterruptible power supply). The UPS serves as a surge protector to prevent your system from being damaged if a power spike is delivered to it. And, sometimes power will fail unexpectedly. The UPS gives you time to save your work and properly shut down your system.
|
If a system is turned off and back on rapidly, it’s probably not good for the system. A very short power drop could mimic this effect and could be hard on both the computer and the monitor. A UPS prevents this.
|
Home - Table Of Contents - Contact Us
How to Build Your Own PC (/byop/) on PCGuide.com
Version 1.0 - Version Date: May 4, 2005
Adapted with permission from a work created by Charlie Palmer.
PCGuide.com Version © Copyright 2005 Charles M. Kozierok. All Rights Reserved.
Not responsible for any loss resulting from the use of this site.